

Creating a small home theater doesn't mean compromising on the cinematic experience. With thoughtful design, proper equipment selection, and strategic installation, even compact spaces can deliver stunning visual and audio performance that rivals commercial theaters. Whether you're converting a spare bedroom, basement alcove, or dedicated media room, understanding the unique challenges and opportunities of small home theater design will help you achieve professional-grade results within your available footprint.
Understanding Small Home Theater Dimensions and Layout
Space optimization begins with accurate measurements and realistic expectations. A small home theater typically ranges from 100 to 200 square feet, accommodating 2 to 6 seats comfortably. The golden ratio for room dimensions (1.0 width : 1.6 length : 2.6 height) helps minimize acoustic issues, though perfect proportions rarely exist in residential spaces.
Room Shape and Acoustic Considerations
Square rooms present the greatest acoustic challenges due to parallel wall reflections creating standing waves. Rectangular spaces naturally distribute sound modes more evenly. When evaluating your small home theater location, consider these dimensional priorities:
- Length: Minimum 12 feet to accommodate screen size and seating distance
- Width: 10 to 14 feet for proper speaker separation and immersive audio
- Height: 8 to 9 feet for ceiling-mounted speakers and acoustic treatment
- Door placement: Rear or side entry to minimize light leaks and sound transmission
The practical home theater design guidelines from industry experts emphasize that thoughtful layout matters more than raw square footage. Your seating should be positioned at least 1.5 times the screen diagonal from the display, while maintaining at least 2 feet between the front row and side walls for speaker placement.
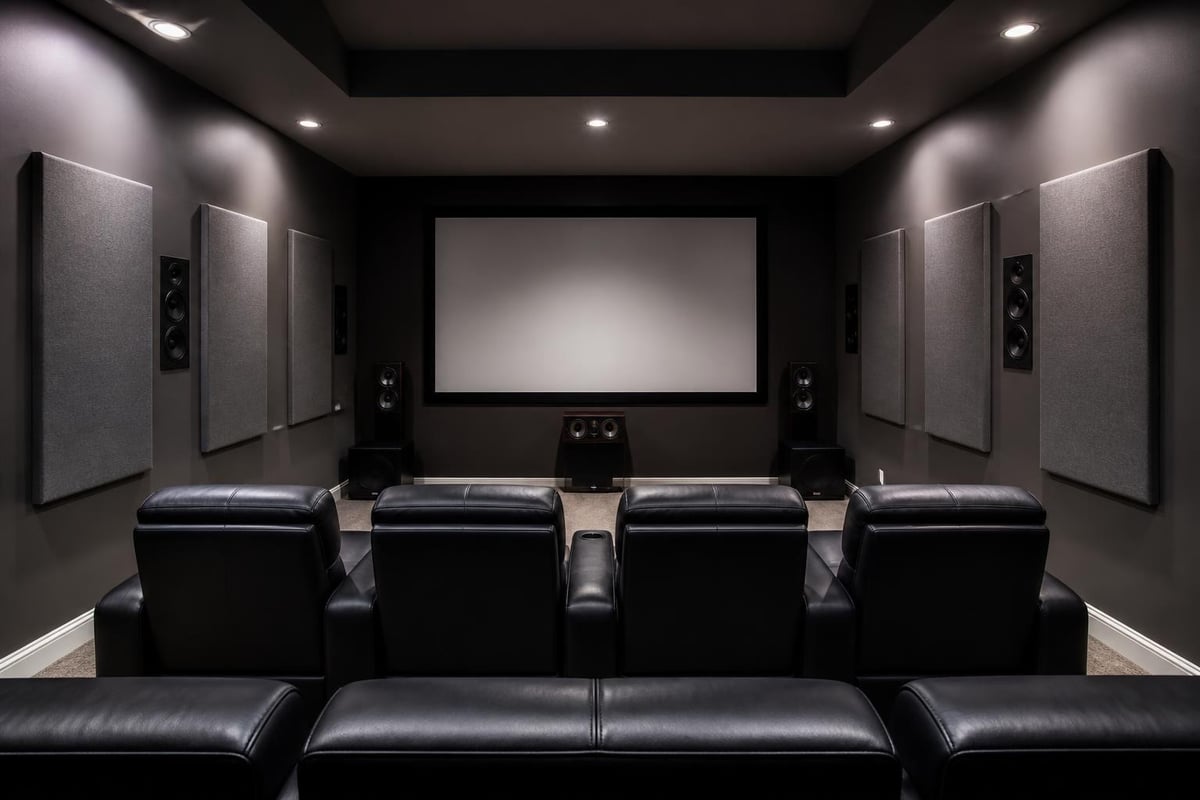
Projection Systems and Screen Selection for Compact Spaces
Screen size and projection technology define the visual centerpiece of your small home theater. For rooms under 15 feet deep, short-throw or ultra-short-throw projectors eliminate the need for extensive ceiling mounts while delivering 100 to 120-inch images from minimal distances.
Projector Throw Distance and Brightness
Calculating the correct throw ratio prevents installation headaches. Standard projectors require 1.5 to 2.0 times the screen width in throw distance, while short-throw models reduce this to 0.4 to 1.0 ratio. The RTINGS throw distance calculator provides precise measurements for specific projector models.
| Projector Type | Throw Ratio | Distance for 100" Screen | Best Small Theater Use |
|---|---|---|---|
| Standard | 1.5:1 to 2.0:1 | 12-17 feet | Dedicated rooms only |
| Short-throw | 0.4:1 to 1.0:1 | 3-8 feet | Most small theaters |
| Ultra-short-throw | 0.2:1 to 0.4:1 | 1-3 feet | Very compact spaces |
Brightness requirements increase in smaller rooms due to screen gain and ambient reflection. Target 1,500 to 2,500 lumens for light-controlled environments. Fixed-frame screens offer superior flatness and acoustic transparency, with AT (acoustically transparent) materials enabling behind-screen speaker placement to save valuable wall space in your small home theater.
Display Alternatives
Large-format OLED and QLED displays now reach 85 inches, offering compelling alternatives to projection in very small theaters. These require no throw distance, eliminate lamp maintenance, and perform well in rooms with ambient light challenges. However, they cap viewing angles and maximum size compared to projection systems.
Audio System Architecture for Limited Spaces
Sound quality defines the home theater experience, and proper speaker placement matters more than equipment cost. A small home theater presents unique acoustic advantages: shorter speaker distances reduce power requirements, while controlled boundaries enhance bass response when properly managed.
Speaker Configuration Options
Begin with a 5.1 system as the foundation: left, center, right, two surrounds, and one subwoofer. This configuration delivers convincing surround effects within compact dimensions. As budgets and expertise grow, upgrade to 5.1.2 or 7.1.4 Atmos configurations.
The Dolby Atmos speaker setup guide provides official placement specifications. In small home theater installations, ceiling speakers should be positioned 2 to 4 feet forward of the seating position at 45-degree angles for optimal overhead effects.
- Front speakers: 22 to 30 degrees off-center from main seating position
- Center channel: Directly above or below screen at ear height
- Surrounds: 90 to 110 degrees from center, 2 feet above ear level
- Subwoofer: Corner placement for maximum output, though mid-wall positions often provide smoother response
In-wall and in-ceiling speakers maximize floor space while delivering exceptional performance. Modern designs from specialized manufacturers incorporate the tweeters, midrange drivers, and waveguides necessary for theater-grade reproduction within shallow mounting depths.
Subwoofer Placement and Bass Management
Small rooms naturally reinforce bass frequencies, requiring careful subwoofer integration. The "subwoofer crawl" technique identifies optimal placement: position the sub at your primary seat, play bass-heavy content, then crawl around the room perimeter listening for the smoothest, most powerful bass. That location becomes your subwoofer position.
Dual subwoofers dramatically improve bass consistency across multiple seats. Placing subs at opposing mid-wall positions or in diagonal corners creates overlapping bass patterns that minimize nulls and peaks inherent in small home theater acoustics.
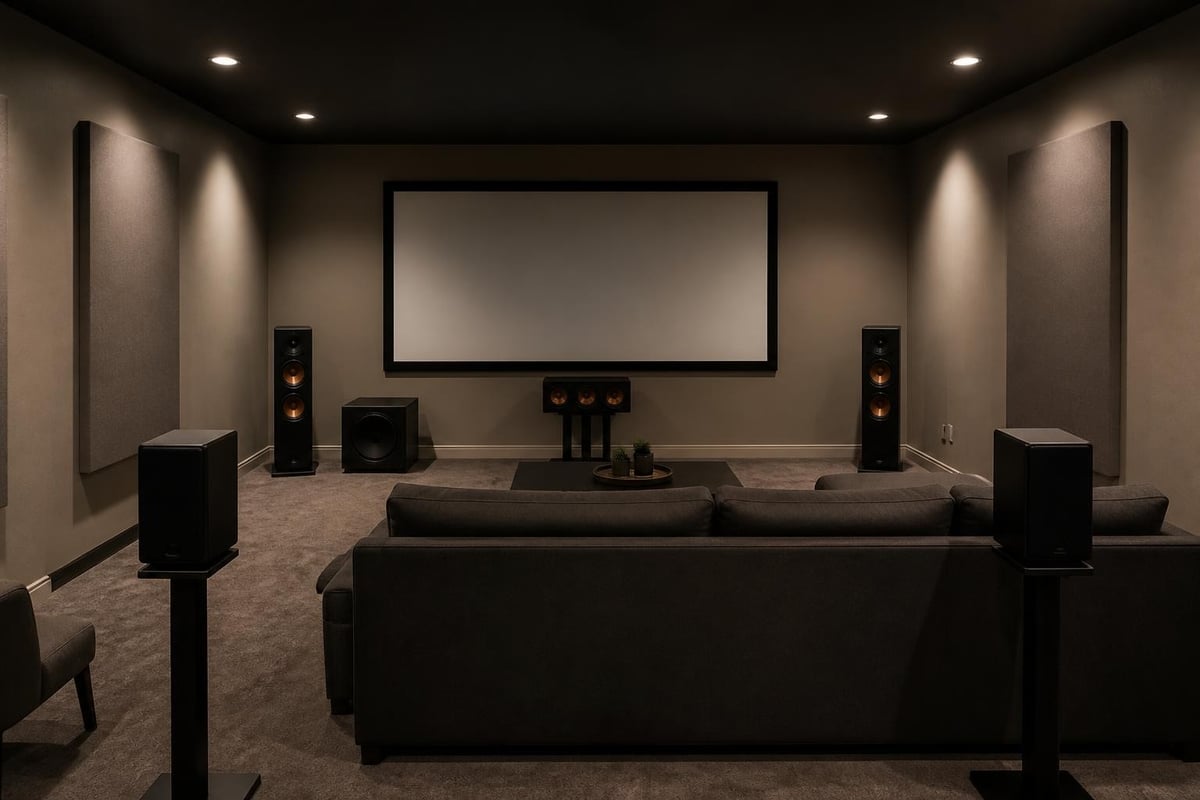
Acoustic Treatment and Sound Isolation
Untreated rooms suffer from echoes, frequency imbalances, and insufficient bass control. A small home theater benefits enormously from targeted acoustic treatment, which costs far less than equipment upgrades while delivering immediately audible improvements.
Absorption and Diffusion Strategy
First reflections from side walls, ceiling, and floor reach listeners shortly after direct sound, causing comb filtering and reduced clarity. Position 2-inch acoustic panels at first reflection points (determined by the mirror trick: sit in your seat and have someone move a mirror along walls until you see each speaker).
- Primary reflection zones: Side walls at speaker height, ceiling between screen and seating
- Bass traps: All corners, floor-to-ceiling for maximum effectiveness
- Rear wall treatment: Diffusion preferred over absorption to maintain spaciousness
- Ceiling treatment: 20-30% coverage reduces flutter echo
The CEDIA immersive audio design standards recommend achieving RT60 (reverberation time) of 0.2 to 0.4 seconds in small home theater environments. This controlled decay preserves dialogue intelligibility while maintaining cinematic impact.
Sound Isolation from Adjacent Spaces
Preventing sound transmission protects household harmony and preserves dynamic range. Effective isolation requires addressing three transmission paths: airborne sound through walls, structural vibration through framing, and flanking paths through HVAC and electrical penetrations.
| Isolation Method | STC Rating | Cost Factor | Effectiveness |
|---|---|---|---|
| Standard drywall | 33-38 | Baseline | Minimal |
| Double drywall + Green Glue | 52-56 | 2-3x | Good |
| Decoupled wall assembly | 60-65 | 4-5x | Excellent |
| Room-within-room construction | 70+ | 8-10x | Maximum |
Most small home theater projects achieve satisfactory isolation with double-layer drywall, resilient channel, and solid-core doors with proper seals. Budget 15-20% of total project costs for acoustic treatment and isolation in dedicated conversions.
Seating, Lighting, and Environmental Control
Comfort and ambiance transform a small home theater from technical achievement into cherished retreat. Purpose-built theater seating provides ergonomic support during extended viewing while incorporating features like cup holders, storage, and motorized recline.
Seating Layout and Riser Design
Single-row configurations work well in very small theaters under 12 feet deep. Two-row layouts require risers elevating the back row 12 inches minimum for sight lines over front-row heads. Calculate riser height using this formula: (back row eye height – front row head height) + 6-inch clearance.
Theater seating typically consumes 30 to 36 inches of depth per row including legroom. Allow 22 to 28 inches of width per seat, with wider spacing improving the premium feel. Motorized recliners require additional depth when fully extended.
For clients seeking exceptional cinema experiences in compact spaces, a professionally designed Home cinema room delivers turnkey solutions with optimized acoustics, calibrated audio systems, and custom seating configurations tailored to your specific dimensions and performance goals.
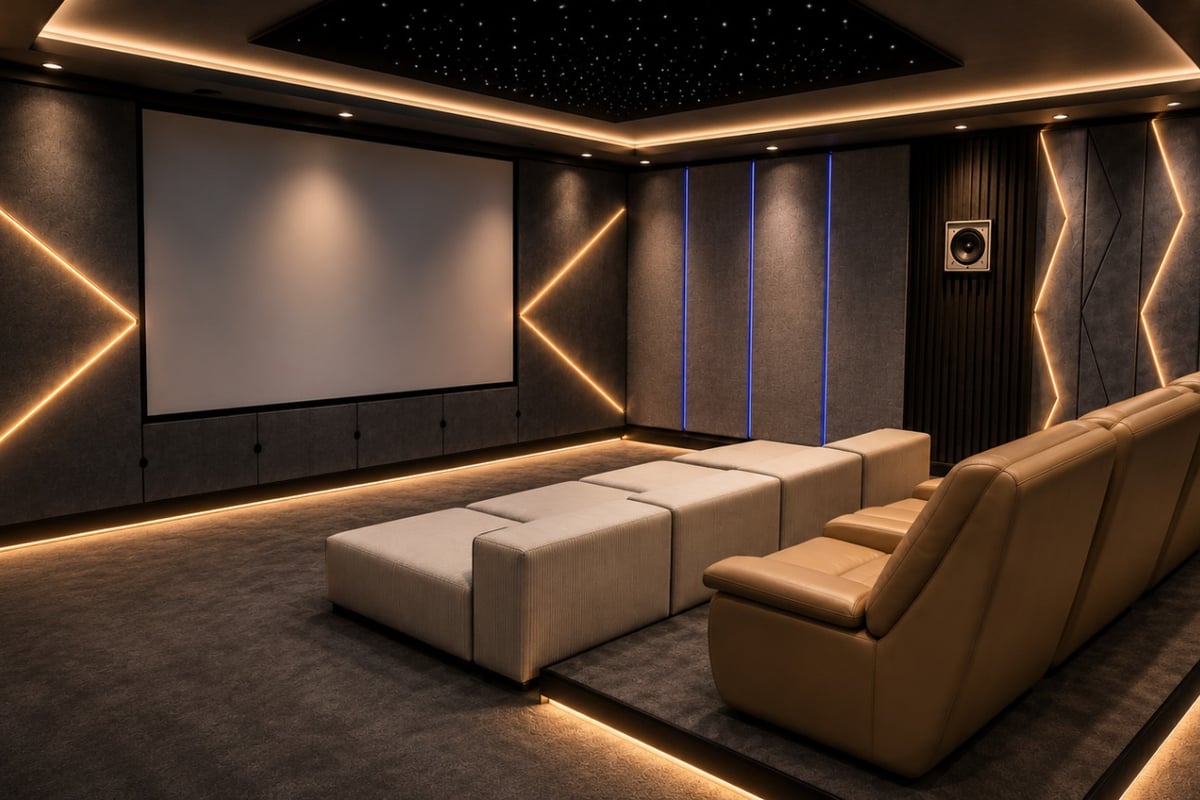
Lighting Design Principles
Layered lighting provides functionality without compromising black levels. LED rope lighting along step risers ensures safe navigation, while wall sconces positioned behind the seating plane illuminate pathways without screen reflections.
- Dimmable overhead: 10-20% brightness for pre-show and intermission
- Step lighting: Red or amber LEDs preserve dark adaptation
- Wall sconces: Indirect illumination pointed away from screen
- Smart control: Automated scenes for different activities
All lighting should be controlled via smart systems that integrate with your playback equipment. Lights automatically dim when content begins and gently illuminate during pause or end credits.
HVAC and Ventilation Requirements
Enclosed small home theater spaces require dedicated ventilation to manage heat from equipment and occupants. Projectors, amplifiers, and multiple viewers generate significant thermal loads in confined volumes. The ASHRAE ventilation standards recommend 15 CFM of outside air per occupant minimum.
Quiet operation matters critically in theaters. Standard HVAC registers create objectionable noise during quiet passages. Specify inline silencers, oversized ductwork (reduces air velocity and noise), and registers positioned away from the primary seating area. Target noise floor below NC-25 for reference-quality environments.
Equipment Integration and System Calibration
A small home theater succeeds through integration, not just component quality. AV receivers serve as system hubs, providing switching, processing, and amplification. Modern receivers incorporate room correction software (Audyssey, Dirac, YPAO) that measures speaker response and automatically adjusts for room acoustics.
Source Components and Switching
Consolidate sources through a quality AV receiver supporting HDMI 2.1 for 4K/120Hz and HDR formats. Typical source lineup includes:
- 4K Blu-ray player: Reference quality video and lossless audio
- Streaming device: Netflix, Disney+, Apple TV content
- Game console: Gaming and additional streaming apps
- Media server: Ripped content library and local media
Hide components in ventilated equipment racks positioned outside the main theater space when possible. Use HDMI over Cat6 extenders to eliminate equipment fan noise from the viewing environment.
Professional Calibration Benefits
While auto-calibration provides solid starting points, professional calibration extracts maximum performance from your small home theater. Certified technicians measure actual light output, color accuracy, and acoustic response with precision instruments, then adjust every system parameter for optimal results.
Calibration addresses speaker levels, crossover frequencies, distance delays, parametric EQ, video gamma curves, color temperature, and grayscale tracking. Expect calibration to consume 4 to 8 hours for comprehensive optimization. The investment typically costs 5-10% of total system value but delivers performance improvements far exceeding the cost.
Smart Control and Automation Integration
Simplified control separates professional installations from DIY efforts. Universal remote systems (Control4, Savant, Crestron) provide single-button scene activation: "Watch Movie" closes shades, dims lights, powers on projector and processor, and launches your preferred streaming app automatically.
Voice control through Alexa or Google Assistant enables hands-free operation, though dedicated remotes remain faster and more reliable for serious viewing. Program macros for common tasks: "Pause" should brighten lights 30%, while "Resume" returns to full darkness.
Whole-home integration extends your small home theater into broader smart home ecosystems. HVAC adjusts temperature before showtime, security systems provide status confirmation, and network infrastructure prioritizes streaming traffic for buffer-free playback.
Maximizing Performance Within Budget Constraints
Exceptional small home theater experiences don't require unlimited budgets. Strategic allocation maximizes returns on every dollar invested. Prioritize these elements in order:
- Room acoustics: Treatment delivers more improvement than expensive electronics
- Screen quality: Fixed-frame with proper gain for your projector
- Center channel: Carries 60% of movie dialogue and effects
- Subwoofer: Quality bass foundation matters more than surround quantity
- Seating comfort: You'll spend hundreds of hours here
Consider phased implementation: start with 5.1 audio and quality projection, then add Atmos height channels, acoustic treatment upgrades, and automation in subsequent phases. This approach spreads costs while ensuring core performance remains strong from day one.
Used and refurbished equipment from reputable dealers offers 30-50% savings with full warranties. Previous-generation receivers and projectors deliver 90% of current performance at significant discounts. Speakers and screens age gracefully, making quality used components smart investments.
Future-Proofing Your Small Theater Investment
Technology evolves rapidly, but thoughtful infrastructure decisions protect your investment. Run conduit between equipment locations and speaker positions, even if you don't immediately fill every channel. Conduit costs pennies during construction but saves thousands in renovation expenses later.
Specify HDMI cables rated for 48Gbps bandwidth supporting 8K/60Hz and 4K/120Hz signals. While current content rarely demands this bandwidth, cables installed behind walls should exceed current requirements. Leave pull strings in all conduit runs for future cable upgrades.
Network infrastructure deserves special attention. Dedicated gigabit Ethernet to the theater supports high-bitrate streaming and future display technologies. Wi-Fi 6E access points provide backup connectivity and serve streaming devices reliably.
Building a small home theater requires balancing technical precision with practical compromises, but the results deliver years of immersive entertainment in spaces both intimate and impressive. Whether you're designing a dedicated cinema room or optimizing a multipurpose space, the principles of proper acoustic treatment, strategic equipment selection, and professional calibration apply universally. ANR media specializes in custom home cinema installations that transform compact spaces into extraordinary viewing environments, from initial design consultation through final calibration and beyond.