

A 7.1 surround sound system represents a significant leap forward in home audio immersion, delivering a complete soundstage that wraps around listeners with precision and depth. This eight-channel configuration has become the gold standard for dedicated home cinema installations, offering a level of sonic engagement that transforms the viewing experience. For homeowners investing in premium entertainment spaces, understanding how this technology works and how to implement it properly makes the difference between adequate sound and truly cinematic performance.
Understanding the 7.1 Channel Configuration
The designation "7.1" describes the exact speaker layout: seven discrete audio channels plus one dedicated subwoofer channel. This configuration extends the earlier 5.1 format by adding two additional surround speakers, creating a more complete rear soundfield.
The channel breakdown consists of three front speakers (left, center, right), four surround speakers (two side, two rear), and one low-frequency effects (LFE) subwoofer. Each channel receives its own distinct audio signal, allowing sound designers to place effects, dialogue, and music with surgical precision throughout the three-dimensional space.
Why Seven Channels Matter
The jump from 5.1 to a 7.1 surround sound system addresses a specific sonic gap. In 5.1 configurations, the two surround speakers typically sit at 90-110 degrees to the listener, leaving the entire rear arc uncovered. When sound effects pan from side to rear, listeners experience a noticeable hole in the soundfield.
Adding rear surround speakers at 135-150 degrees creates seamless continuity. Helicopters can now fly overhead in a complete circle. Ambient effects fill the room without gaps. The official Dolby explanation of surround sound formats highlights how proper speaker placement creates this enveloping experience.
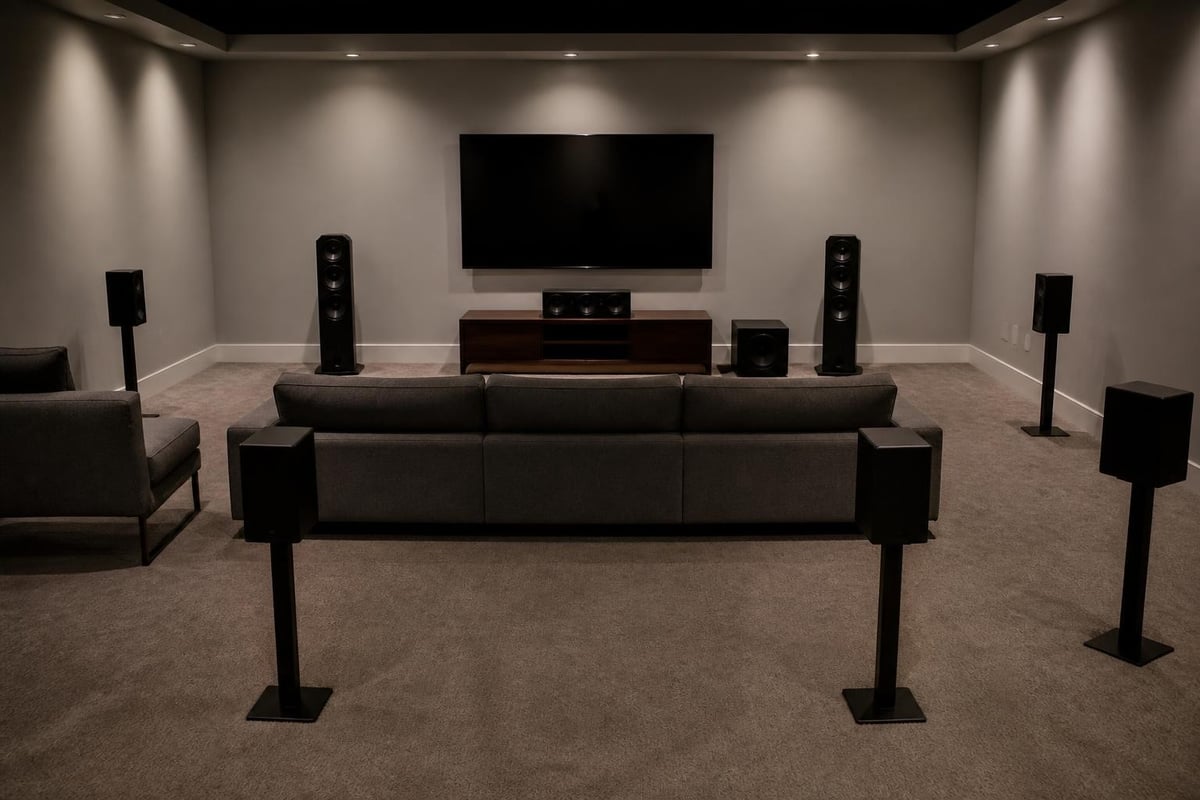
Speaker Placement and Room Acoustics
Proper speaker positioning follows international standards established by the ITU-R BS.775-3 multichannel recommendation, which defines precise angular relationships between listening position and each speaker.
Front Stage Positioning
The three front speakers form the foundation of your 7.1 surround sound system. Place the center channel directly in front of the primary seating position, typically above or below the display. The left and right speakers should sit at 22-30 degrees off-center, forming an equilateral triangle with the listening position.
All three front speakers must align vertically, with tweeters at ear level when seated. Matching the timbral characteristics across the front stage ensures smooth panning and prevents tonal shifts as dialogue moves across the screen.
| Front Speaker | Angle from Center | Height Recommendation |
|---|---|---|
| Center | 0° | Ear level (seated) |
| Left/Right | ±22-30° | Ear level (seated) |
| Distance | Equal to listening position | Tweeter height matched |
Surround Speaker Strategy
The four surround channels require careful consideration. Side surrounds mount at 90-110 degrees, slightly above ear level (1-2 feet higher than seated position). Rear surrounds position at 135-150 degrees, also elevated.
Key surround placement principles:
- Maintain equal distance from primary listening position when possible
- Angle speakers toward the listening area rather than pointing straight across
- Keep surrounds at least 2 feet above seated ear level
- Use diffuse or bipole speakers for side positions to create ambient effects
- Direct-radiating speakers work well for rear positions
Room size dictates some flexibility. Smaller rooms may require compromises, but maintaining the angular relationships remains more important than exact distances. The goal is creating a cohesive sound field without drawing attention to individual speakers.
Equipment Selection and Connectivity
Building a 7.1 surround sound system requires an AV receiver or processor capable of decoding and amplifying eight discrete channels. Modern receivers must support current audio codecs including Dolby TrueHD, DTS-HD Master Audio, and multichannel PCM.
Receiver Specifications to Consider
Processing power determines how effectively your system handles complex soundtracks. Look for receivers rated at least 100 watts per channel at 8 ohms with all channels driven simultaneously. Lesser receivers may only achieve their rated power with two channels active, leading to disappointing results during demanding passages.
The receiver needs sufficient HDMI inputs with eARC (Enhanced Audio Return Channel) support. Understanding how HDMI handles multichannel audio transport is critical for device compatibility. eARC enables lossless multichannel audio from smart TV apps back to the receiver, essential as streaming services increasingly offer advanced audio formats.
Essential receiver features:
- Seven discrete amplifier channels plus LFE output
- HDMI 2.1 with eARC support on main inputs
- Dolby TrueHD and DTS-HD MA decoding
- Automated room correction (Audyssey, Dirac, YPAO)
- Balanced or sufficient amplifier power for speaker impedance
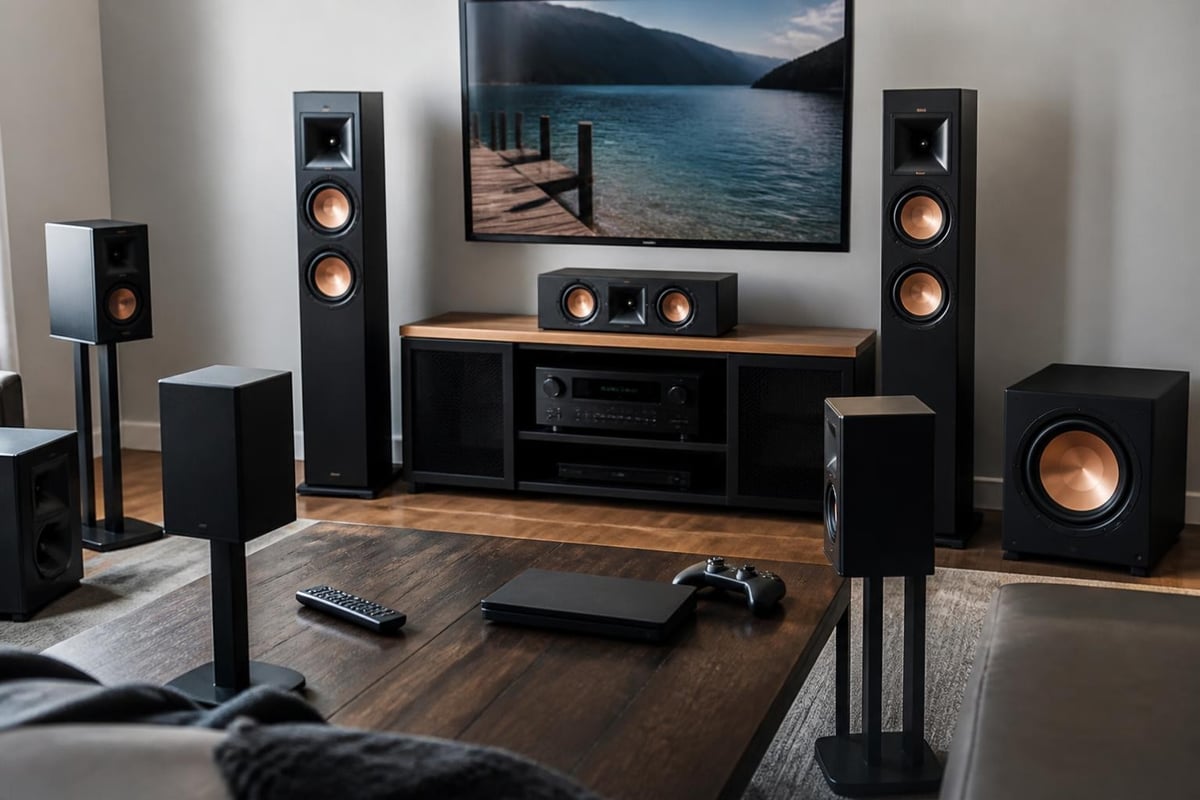
Speaker Selection Criteria
Matching speakers across all channels creates timbral consistency. Ideally, use identical speakers for all seven channels, or at minimum, keep the front three matched and the four surrounds matched.
For dedicated home cinema installations, professional-grade options deliver reference-level performance. M&K Sound manufactures cinema-specific speakers designed explicitly for soundtrack reproduction, offering the kind of dynamic range and clarity that makes every detail in a 7.1 surround sound system emerge with stunning precision.
The subwoofer handles the .1 channel, reproducing frequencies below 80Hz. Quality matters enormously here. A single high-performance subwoofer often outperforms multiple budget models. Look for sealed or well-designed ported enclosures with adequate amplifier power (300+ watts) and driver size (12-15 inches minimum).
Calibration and Optimization
Even perfectly positioned speakers require calibration to account for room acoustics, speaker characteristics, and seating arrangements. Modern AV receivers include automated room correction systems that measure and adjust frequency response, timing, and level for each channel.
Automated Room Correction Process
The calibration process uses a measurement microphone placed at the primary listening position. The receiver generates test tones through each speaker, analyzes the response, and applies equalization and delay to optimize performance.
Typical calibration steps:
- Connect the calibration microphone to the receiver
- Place microphone at main seating position at ear height
- Run automated measurement sequence (5-10 minutes)
- Review detected speaker sizes, distances, and levels
- Verify crossover frequencies (typically 80Hz for all channels)
- Run additional measurements from alternate seating positions
- Save calibration profile and verify results with familiar content
Professional installers often fine-tune automated results using real-time analyzers and measurement software. The CEDIA/CTA RP-22 immersive audio design standard provides detailed performance targets and verification procedures for home installations.
| Calibration Parameter | Target | Tolerance |
|---|---|---|
| Channel Level | 75dB SPL (reference) | ±0.5dB |
| Crossover Frequency | 80Hz (THX standard) | Can adjust per speaker capability |
| Subwoofer Phase | Aligned with mains | Measured at crossover point |
| Speaker Distance | Accurate measurement | ±0.5 feet |
Manual Fine-Tuning
After automated calibration, critical listening reveals areas for improvement. Common adjustments include slight level changes to the center channel for dialogue clarity, subwoofer level tweaking for personal preference, and surround level adjustments based on content type.
The center channel carries approximately 60% of movie soundtrack information. If dialogue sounds thin or gets lost in action scenes, increase center level by 1-2dB above calibration. Conversely, if dialogue sounds unnaturally forward, reduce slightly.
Content Sources and Format Compatibility
A 7.1 surround sound system only performs to its potential with native 7.1 content. Understanding source material and formats ensures you maximize your investment.
Physical Media Advantages
Blu-ray discs remain the gold standard for multichannel audio quality. The Blu-ray Disc Association emphasizes how the format supports lossless codecs including Dolby TrueHD and DTS-HD Master Audio with full 7.1 channels. These lossless formats preserve studio master quality without compression artifacts.
Ultra HD Blu-ray extends capabilities further with object-based formats like Dolby Atmos and DTS:X. While these exceed traditional 7.1 channel counts, they include 7.1 bed layers that play perfectly on channel-based systems.
Streaming Service Considerations
Streaming platforms increasingly offer multichannel audio, though quality varies significantly. Netflix, Disney+, and Apple TV+ provide Dolby Digital Plus 7.1 on select titles, using lossy compression to fit bandwidth constraints. While not matching Blu-ray quality, properly implemented streaming 7.1 significantly outperforms stereo.
Check audio settings within each app and on your streaming device. Many default to stereo or 5.1 unless explicitly configured for maximum channel output. Enable "auto" or "passthrough" audio modes to ensure the receiver receives full 7.1 signals.
Installation Considerations and Professional Setup
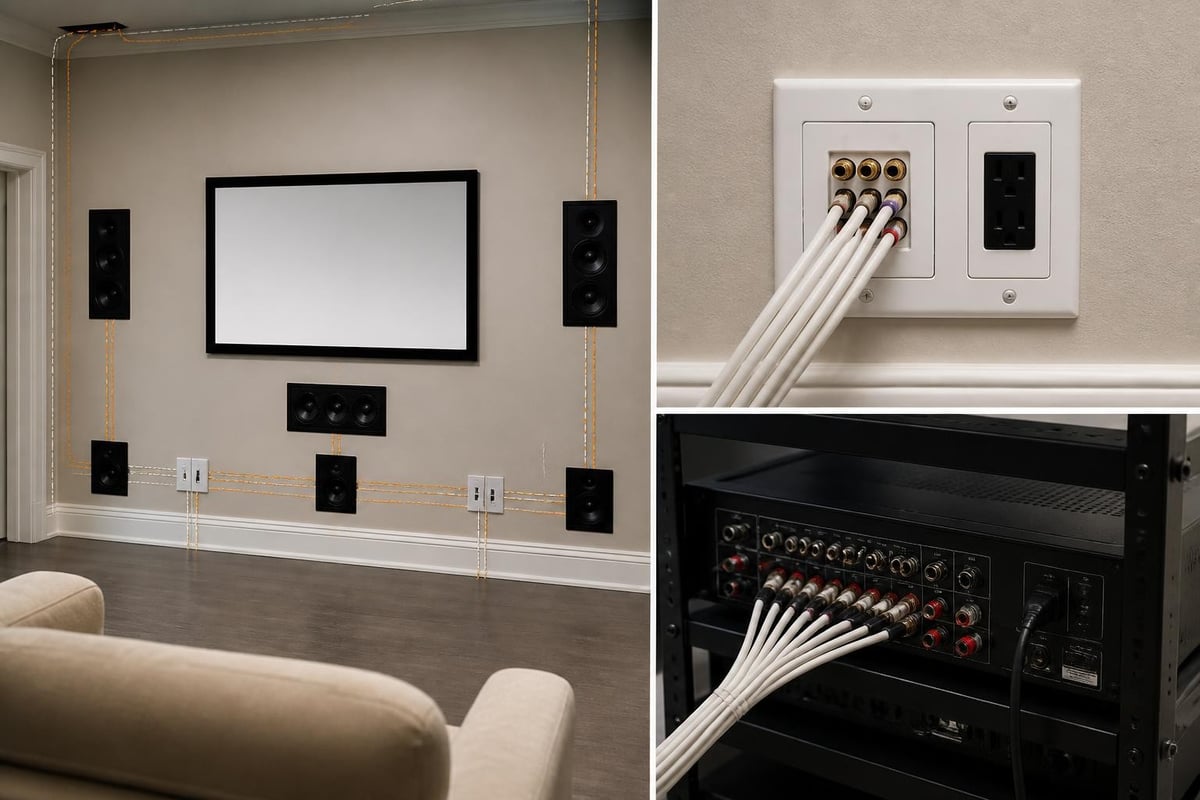
While enthusiast-level installation is possible, complex 7.1 surround sound system implementations benefit enormously from professional expertise. Room construction, acoustic treatment, and wire management present challenges beyond basic equipment setup.
In-Wall and In-Ceiling Integration
Custom installations often specify architectural speakers for clean aesthetics. In-wall speakers for the front stage and in-ceiling speakers for surrounds create minimal visual impact while delivering excellent performance.
For those looking to create a truly immersive environment without compromise, a custom Home cinema room offers turnkey solutions that integrate 7.1 audio with optimized acoustics, lighting control, and seating arrangements designed specifically for cinematic experiences.
Architectural speaker selection requires careful attention to specifications. In-ceiling surrounds need adequate dispersion patterns to fill the listening area from above. Many manufacturers offer models specifically voiced for surround duties with wide radiation patterns.
Acoustic Treatment Fundamentals
Room acoustics dramatically affect 7.1 surround sound system performance. Untreated rooms suffer from excessive reverberation, standing waves, and frequency response irregularities that no amount of electronic processing can fully correct.
Essential acoustic treatments:
- Absorption panels at first reflection points (side walls, ceiling)
- Bass traps in corners to control low-frequency buildup
- Diffusion on rear wall to scatter sound and reduce slap echo
- Thick carpeting or rugs to minimize floor reflections
- Heavy curtains or fabric wall panels to reduce mid/high-frequency reflections
Professional acoustic analysis uses measurement software to identify specific problem areas. Treating these targeted zones yields better results than random panel placement.
Maintenance and Troubleshooting
Long-term satisfaction with your 7.1 surround sound system requires occasional maintenance and knowing how to diagnose common issues.
Common Configuration Issues
Audio dropouts often stem from HDMI handshake problems. Ensure all devices support the same HDMI version and enable CEC (Consumer Electronics Control) settings consistently across sources. High-quality certified HDMI cables prevent signal integrity issues, especially for runs exceeding 15 feet.
If certain channels produce no sound, verify speaker wire connections at both receiver and speaker terminals. Accidentally reversed polarity (positive to negative) won't damage equipment but causes weak bass and poor imaging. Check polarity by listening to mono test tones through suspect speakers.
| Symptom | Likely Cause | Solution |
|---|---|---|
| Dialogue unclear | Center channel too low | Increase center level 1-2dB |
| Weak bass | Subwoofer phase inverted | Toggle phase switch, measure response |
| Sound from wrong speakers | Incorrect channel mapping | Verify speaker assignments in receiver menu |
| Audio dropout | HDMI handshake failure | Power cycle devices, update firmware |
Firmware Updates and System Evolution
Manufacturers regularly release firmware updates addressing bugs, adding features, and improving compatibility. Check your receiver manufacturer's website quarterly for updates and read release notes carefully before installing.
As technology evolves, your 7.1 surround sound system can adapt. Most 7.1 receivers support software-based object audio rendering, playing Dolby Atmos and DTS:X content through existing speakers. While not matching dedicated height channels, these modes extract considerable immersion from traditional layouts.
Advanced Mixing and Monitoring Applications
Beyond playback, 7.1 surround sound systems serve professional monitoring functions for content creators, musicians, and post-production specialists working with multichannel audio.
Studio Implementation
Professional studios require accurate monitoring to make critical mix decisions. Sound On Sound’s guide to surround monitoring details DAW configuration, monitoring controller selection, and calibration procedures for professional environments.
Studio 7.1 setups demand speakers with flat frequency response, minimal coloration, and matched performance across all positions. Near-field monitors work well in smaller rooms, while larger facilities may use soffit-mounted systems with extensive acoustic design.
Multi-Format Production Workflow
Modern post-production increasingly works with immersive formats but requires 7.1 bed monitoring for compatibility verification. A properly calibrated 7.1 surround sound system allows mixers to ensure content translates properly to traditional channel-based systems while also serving as the bed layer for height channel work.
Bass management in professional monitoring differs from home theater approaches. Studio setups often allow full-range monitoring per channel with optional subwoofer augmentation, giving engineers precise control over low-frequency distribution across the mix.
A properly implemented 7.1 surround sound system delivers transformative audio performance that brings film soundtracks, music, and gaming to life with stunning realism and precision. The investment in quality equipment, thoughtful placement, and professional calibration pays dividends every time you experience your favorite content. Whether you're building a dedicated cinema space or upgrading your existing setup, ANR media brings decades of expertise in custom home cinema design and installation, creating perfectly tuned environments where technology and craftsmanship combine to deliver extraordinary experiences. Contact our team to discuss how we can design the ideal 7.1 system for your space and preferences.